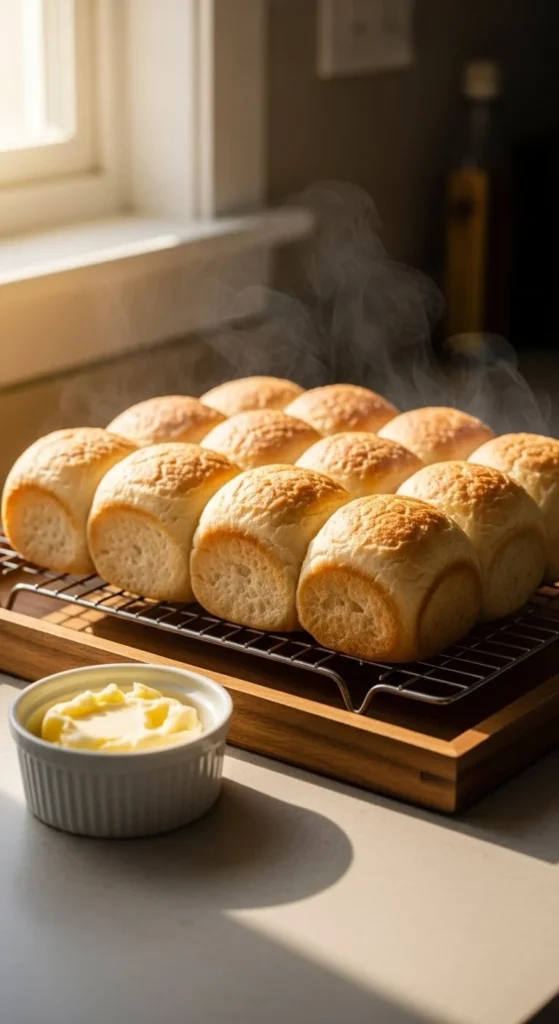
There’s something magical about the smell of freshly baked bread filling your kitchen — especially when it’s a batch of soft, buttery dinner rolls. Whether you’re serving them alongside a hearty stew or at a festive holiday table, these pillowy rolls have a way of stealing the show. And the best part? You can make them right at home — no bakery needed!
The Secret to the Perfect Soft Roll
Before we dive into the step-by-step process, let’s talk about what makes a dinner roll truly melt-in-your-mouth soft.
It all comes down to:
- Proper kneading — to build gluten that gives structure without toughness.
- The right balance of fat — butter and milk keep the rolls tender and rich.
- Gentle proofing — allowing the dough to rise fully so it’s light and airy.
If you get these three things right, you’re on your way to bread heaven.
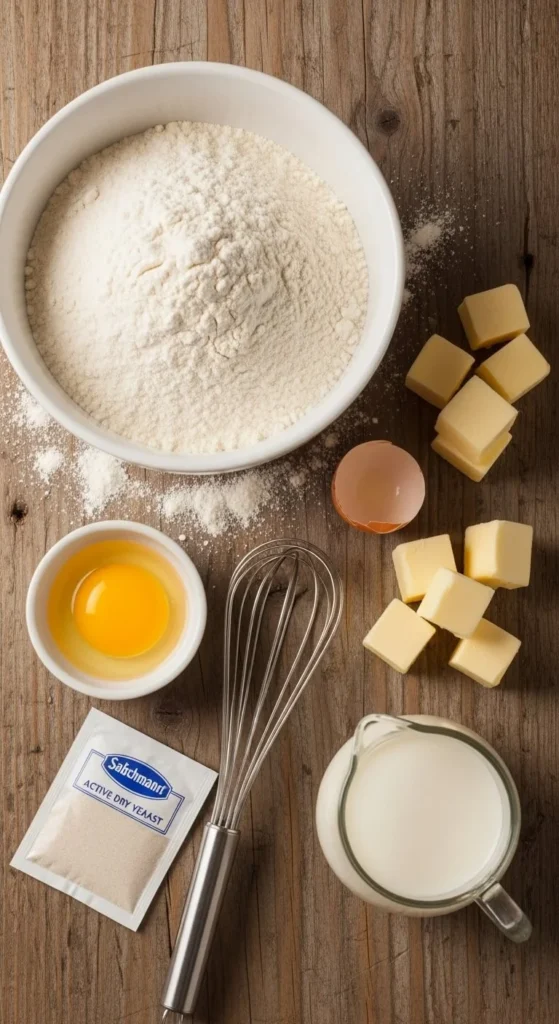
Ingredients You’ll Need
Let’s gather your baking essentials. You probably already have most of them in your pantry!
- 3 ½ cups all-purpose flour
- 1 packet (2 ¼ tsp) active dry yeast
- 1 cup warm milk (about 110°F)
- ¼ cup unsalted butter, softened
- ¼ cup sugar
- 1 large egg
- 1 teaspoon salt
- Extra melted butter for brushing
Pro Tip: For even softer rolls, substitute half of the milk with warm heavy cream or buttermilk.
Step 1: Activate the Yeast
Warm milk + sugar + yeast = the start of something beautiful.
- In a small bowl, combine warm milk, sugar, and yeast.
- Let it sit for about 5–10 minutes, until frothy and bubbly.
If it doesn’t foam, your yeast might be old — and that’s a no-go for fluffy rolls.
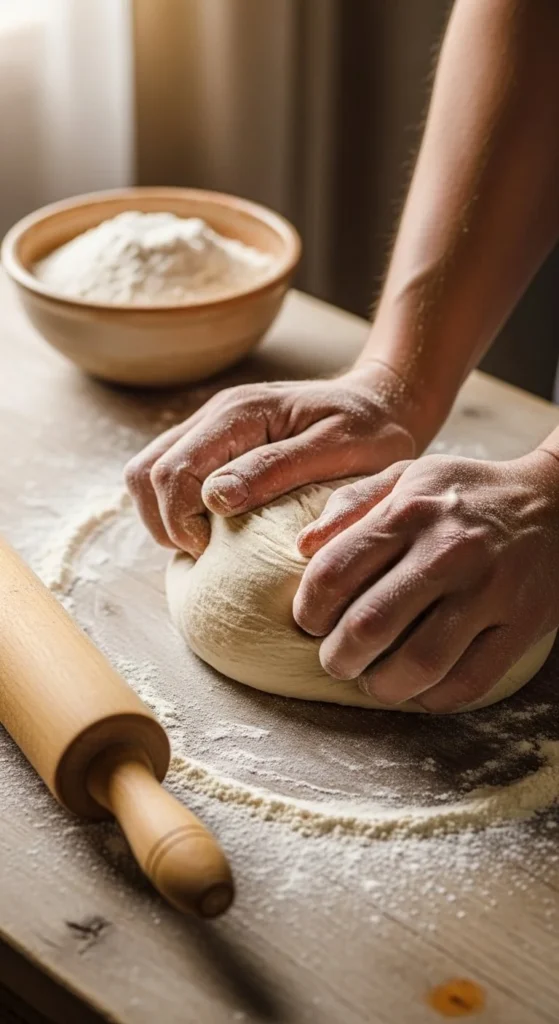
Step 2: Make the Dough
- In a large mixing bowl, whisk together the flour and salt.
- Add the yeast mixture, egg, and softened butter.
- Mix until the dough begins to come together.
Now comes the fun (and slightly messy) part — kneading.
- Knead by hand on a floured surface for about 8–10 minutes, or use a stand mixer with a dough hook for 6 minutes.
- You’re aiming for a smooth, elastic dough that’s soft but not sticky.
Step 3: Let It Rise (Patience Pays Off!)
Place the dough in a lightly greased bowl and cover it with a damp towel or plastic wrap.
Let it rise in a warm spot until doubled in size, about 1 to 1.5 hours.
You’ll know it’s ready when you press a finger into the dough and the indentation slowly bounces back.
Pro Tip: A slightly warm oven (turned off) makes a perfect proofing spot.
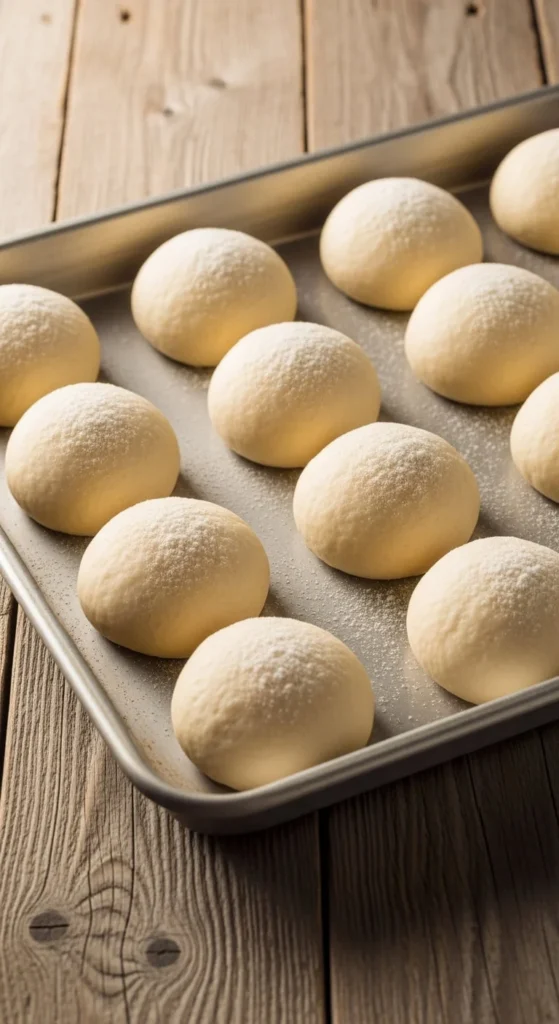
Step 4: Shape the Rolls
Once your dough has doubled, gently punch it down to release air bubbles.
Divide it into 12 equal pieces for large rolls or 15–18 for smaller ones.
Shape each piece into a smooth ball by tucking the edges under and pinching them closed at the bottom.
Arrange the rolls in a greased baking pan, leaving just a little space between them — they’ll expand as they bake!
Cover the tray and let the rolls rise again for 30–40 minutes, or until puffy and touching.
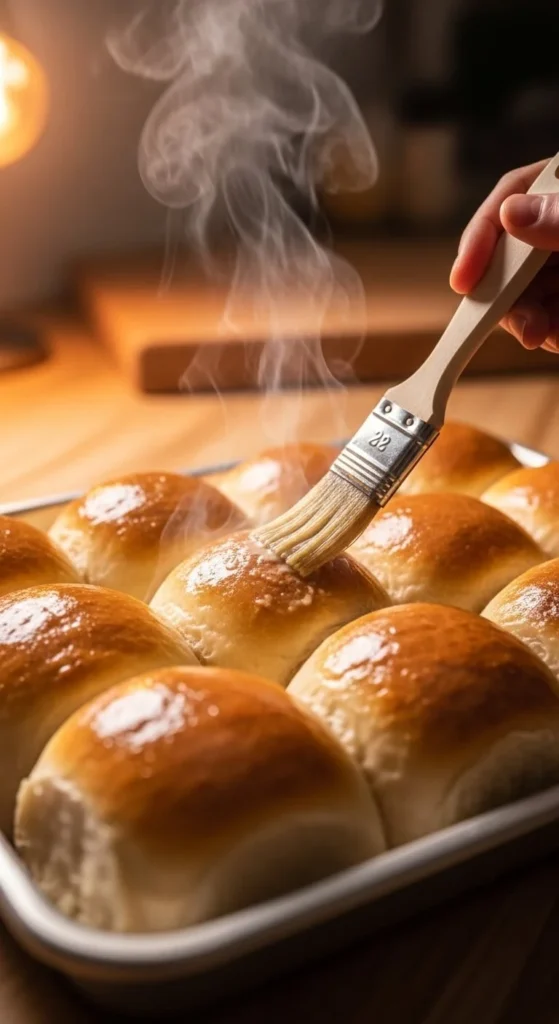
Step 5: Bake to Golden Perfection
Preheat your oven to 375°F (190°C).
Bake the rolls for 15–18 minutes, or until they’re golden brown on top.
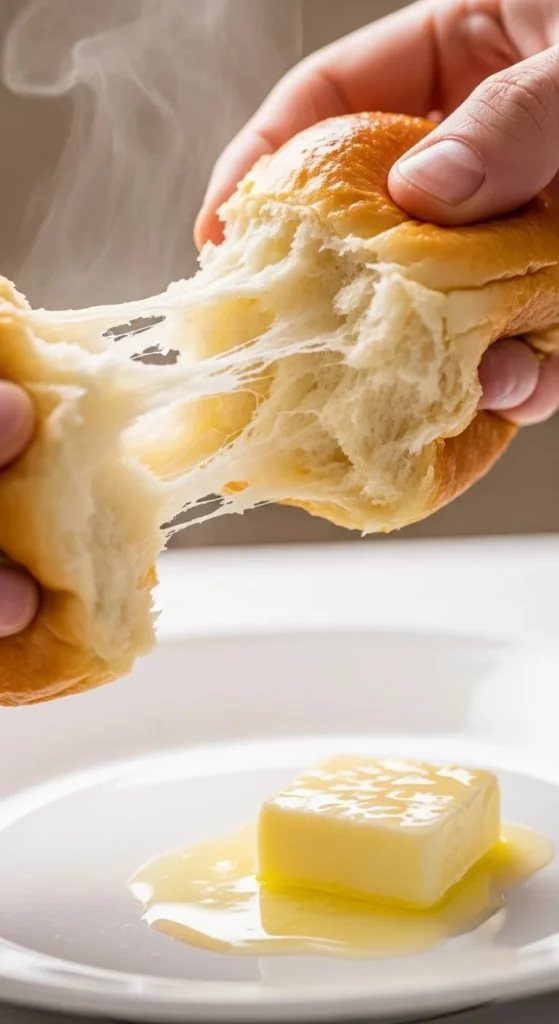
As soon as they come out, brush them generously with melted butter. This not only adds flavor but keeps them irresistibly soft.
Tips for Fluffy Success Every Time
- Use room-temperature ingredients. Cold butter or milk can slow the yeast.
- Don’t rush the rise. Give the dough enough time to proof — it’s worth it.
- Store properly. Keep leftover rolls in an airtight container or wrapped in foil to stay soft for up to 3 days.
To reheat, just pop them in the oven at 300°F for 5 minutes — they’ll taste freshly baked again!
Optional Add-Ons
Want to make them extra special? Try these twists:
- Brush with garlic butter and sprinkle with parsley for savory rolls.
- Add a touch of honey to the dough for a subtly sweet version.
- Stuff them with cheese before baking for a gooey surprise.
The Final Bite
There’s nothing quite like tearing into a warm, buttery dinner roll — soft, fluffy, and rich with that homemade magic. Whether you’re hosting a family feast or just craving comfort, these rolls deliver pure joy in every bite.
So go ahead — save this recipe for later, share it with your favorite foodies, and let your kitchen smell like a bakery tonight.
Ready to bake your way to bread bliss?
Don’t forget to pin this recipe — your future self will thank you!
Leave a Reply